Task Manager
Note
Beginning with NLS 5.24, the setup and creation of new Work Packets are no longer supported. Upgraded databases with existing configurations of Work Packet Templates are not affected and will continue to work.Because the Nortridge Loan System Task Manager is a complex development environment that will allow you to program your own user-defined tasks, it would be impossible to explain its implementation by any method other than by example.
In the sections that follow, we shall set up a series of Task Templates for the purpose of tracking a loan through the application and approval process.
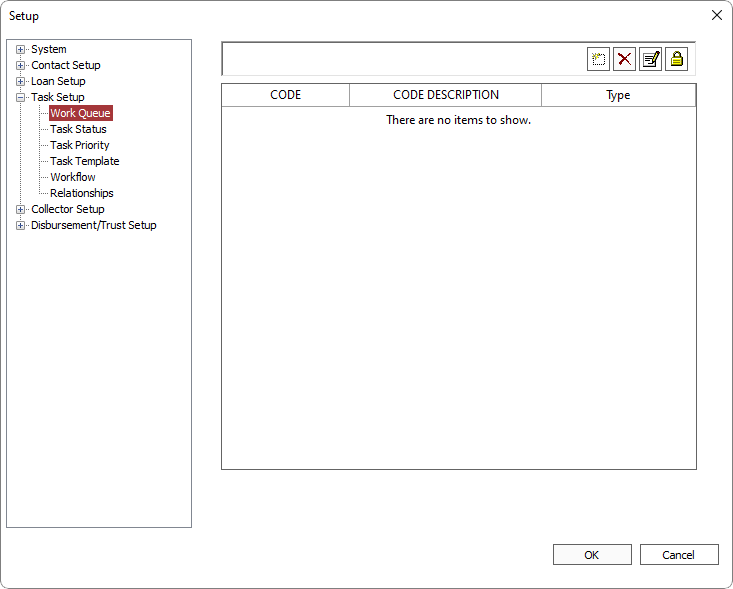
Setup of tasks and its related components are performed in File > Setup > Task Setup.
Task Manager Example
The design of the workflow of these tasks is as follows:
- First, a contact will be entered into the loan system for the potential borrower. A Work Packet will be entered onto that contact. This is the Loan Origination work packet. It will contain visual basic scripting code that will automatically generate an Originate Loan task. This task will have its own code to generate a Loan Application task.
- The Loan Application task will contain user-defined fields that will allow the Loan System user to track the status of the application, and when the task has been modified to show that the application has been completed, the task will create three new tasks: Verify Employment, Verify Deposit, and Verify Credit.
- The code of each of these tasks is designed so that no further automated action will be taken until all three tasks have been completed. Once the borrower’s employment has been satisfactorily verified, and the borrower’s bank account has also been verified, and the credit report has been acquired, the next automated action will occur and will depend on the results of the credit score that was entered on the Verify Credit task.
- If the credit score is less than 650, a Loan Denied task will be generated. This task will require a system user to generate the denial letter and close out the application.
- If the credit score is greater than 750, a Loan Approval task will be generated. This will automatically generate another task that will require the creation of loan documents so that the loan may be created and funded.
- If the credit score is between 650 and 750, a task is automatically generated called “Loan Committee.” On this task there is a user-defined drop down field that will allow an NLS user to enter the decision of the Loan committee. Based on the decision entered in this field, either a Loan Denied or a Loan Approval task will be created.
The following sections will illustrate how to set up some of the work packet and task templates for these tasks.
Configuring the Work Packet Template
We begin by configuring a template for the work packets that will contain all of the tasks for the loan application and approval process.
First, we add a new work packet template called LOAN ORIGINATION. Since this work packet will only be added to contacts, we select the contact template type.
The Work Packets that are created by this template will be used only to hold the tasks that will be under it, so none of the data fields on the Work Packet will be populated. Therefore, we can check the “Hide” parameter on all of the user-defined fields for this work packet template.
When added to a contact, Work Packets that are created by this template will automatically create a task called ORIGINATE LOAN. The scripting to create this task is set to execute “After Create.”
The After Create Script
VBScript
Set Task = nlsApp.Tasks.New(1)
nlsApp.Tasks.BeginTransaction
Task.WorkPacketRefno = current_work_packet_refno
Task.StatusCodeID = 1
Task.NLSRefno = nlsApp.GetField("CIF_REFNO")
If (Task.Save = -1) Then
    nlsApp.Tasks.RollbackTransaction
Else
    nlsApp.Tasks.CommitTransaction
End If
Script Explanation
|
Set Task = nlsApp.Tasks.New(1) |
Calls a function Tasks.New from within the NLS application. This function creates a new task using the task template specified. In this case, a task will be created using Task Template #1.
|
|
nlsApp.Tasks.BeginTransaction |
Starts a process of entering parameters onto the task that is being added. This process will be concluded by either a “Commit” or a “Rollback” statement. |
|
Task.WorkPacketRefno = current_work_packet_refno |
By setting the work packet reference number on the new task to the reference number of the current work packet that is executing this script, we ensure that the new task is created under this work packet. |
|
Task.StatusCodeID = 1 |
Sets the Status of the Task to “Open.” This is based on the Task status codes that you have configured. |
|
Task.NLSRefno = nlsApp.GetField("CIF_REFNO") |
Sets the reference number of the new task to the reference number of the contact under which the Work Packet has been added, so that if you query for tasks under the contact you will see this task. |
|
If (Task.Save = -1) Then nlsApp.Tasks.RollbackTransaction |
If there is any error in the processes of setting parameters on a task, NLS automatically sets a variable called Task.Save to the value –1. These statements roll back the process of entering the task if such an error is detected.
|
|
Else nlsApp.Tasks.CommitTransaction End If |
If there is no error, the task entry is committed. |
The Originate Loan Task Template
The Work Packet Template for Loan Origination automatically creates a task using the Originate Loan Task Template. If it attempts to do so before that task has been configured, it will cause an error.
First, we add a new task template called ORIGINATE LOAN. Since this Task will only be added to contacts, we select the contact template type.
We set the Label for User-Defined Field #1 to “Loan Status.” Make the Default Value “Needs Application.” Make the field type a Drop-Down Field. In the items list for this field, we create the options: Needs Application, Application Complete, Pending Verification, In Committee, Loan Denied, and Loan Approved. The value of this user-defined field will be automatically updated by the other tasks in the workflow as appropriate.
That is the only user-defined field needed for this task, so the rest are set to hidden.
This task is supposed to stay open during the entire loan approval process. Another task, just for the application must be created, so we place scripting on this task to do so. This script is also set to “After Create.”
The After Create Script
VBScript
Set Task = nlsApp.Tasks.New(2)
nlsApp.Tasks.BeginTransaction
Task.WorkPacketRefno = current_work_packet_refno
Task.StatusCodeID = 1
Task.NLSRefno = nlsApp.GetField("CIF_REFNO")
If (Task.Save = -1) Then
    nlsApp.Tasks.RollbackTransaction
Else
    nlsApp.Tasks.CommitTransaction
End If
This script is identical to the one on the Loan Origination Work Packet except that the task created by it uses task template #2 (Loan Application) instead of task template #1 (Originate Loan).
The Loan Application Task Template
The task template for the Loan Application tasks must be configured prior to adding the work packet on any contact, as the work packet will automatically set up an Originate Loan task, and the Originate Loan task will automatically set up a Loan Application Task. If the Loan system tries to set up a task using this template before the template is configured, an error would result.
First, we add a new task template called LOAN APPLICATION. Since this Task will only be added to contacts, we select the contact template type.
We set the label for User-Defined Field #1 to App Status. Make the Default Value “Send App.” Make the field type a Drop-Down Field. In the items list for this field, we create the options: Send App, App Sent, App Received, App Incomplete, and App Complete. The value of this user-defined field is to be updated by the NLS users as the application status changes. When they set the status to “App Complete” the scripting will automatically create the tasks for the next phase.
That is the only user-defined field needed for this task, so the rest are set to hidden.
When the Application Status is set to “App Complete,” and this task is marked as finished, the tasks to verify employment, deposit, and credit score will be automatically created by the scripting on this task, which is set to “After Save” since it must be run any time a modification is made to this task.
The After Save Script
VBScript
SET CurrentTask = nlsApp.Tasks.Open(current_task_refno)
IF (CurrentTask.UDF1 = "APP COMPLETE" AND CurrentTask.StatusCodeID <> 2) THEN
    nlsApp.Tasks.BeginTransaction
    Error_Found = 0
    SET Task = nlsApp.Tasks.New(3)
    Task.WorkPacketRefno = current_work_packet_refno
    Task.StatusCodeID = 1
    Task.NLSRefno = CurrentTask.NLSRefno
    IF (Task.Save = -1) THEN
        Error_Found = 1
    END IF
    SET Task = nlsApp.Tasks.New(4)
    Task.WorkPacketRefno = current_work_packet_refno
    Task.StatusCodeID = 1
    Task.NLSRefno = CurrentTask.NLSRefno
    IF (Task.Save = -1) THEN
        Error_Found = 1
    END IF
    SET Task = nlsApp.Tasks.New(5)
    Task.WorkPacketRefno = current_work_packet_refno
    Task.StatusCodeID = 1
    Task.NLSRefno = CurrentTask.NLSRefno
    IF (Task.Save = -1) THEN
        Error_Found = 1
    END IF
    CurrentTask.CompletionDate = NOW
    CurrentTask.StatusCodeID = 2
    IF (CurrentTask.Save = -1) THEN
        Error_Found = 1
    END IF
    IF (Error_Found = 1) THEN
        nlsApp.Tasks.RollbackTransaction
    ELSE
        nlsApp.Tasks.CommitTransaction
    END IF
END IF
Script Explanation
|
SET CurrentTask = nlsApp.Tasks.Open(current_task_refno) |
Creates an object called CurrentTask, and assigns it the value of the reference number of the task that is running the script. This reference number will be used to make sure that the tasks we are going to create are properly linked with the task that is creating them, its work packet, and its contact.
|
|
IF (CurrentTask.UDF1 = "APP COMPLETE" AND CurrentTask.StatusCodeID <> 2) THEN |
Dictates that the code that follows will only be executed if the Application Status is set to "APP COMPLETE" and the Status Code of the Loan Application task is set to completed. |
|
nlsApp.Tasks.BeginTransaction |
Starts a process of entering parameters onto the task that is being added. This process will be concluded by either a “Commit” or a “Rollback” statement. |
|
Error_Found = 0 |
Sets an initialization value of 0 for a variable called Error_Found.
|
|
SET Task = nlsApp.Tasks.New(3) |
Calls a function Task.New from within the NLS application (as specified by App). This function creates a new task using the task template specified. In this case, a task will be created using Task Template #3 (Verify Employment).
|
|
Task.WorkPacketRefno = current_work_packet_refno |
By setting the work packet reference number on the new task to the reference number of the current work packet that is executing this script, we ensure that the new task is created under this work packet. |
|
Task.StatusCodeID = 1 |
Sets the Status of the Task to “Open.” This is based on the Task status codes that you have configured. |
|
Task.NLSRefno = CurrentTask.NLSRefno |
Sets the reference number of the new task to the reference number of the current task. Having the same reference number will make sure that the tasks are attached to the same work packet, contact, etc. |
|
IF (Task.Save = -1) THEN Error_Found = 1 END IF |
If there is any error in the processes of setting parameters on a task, NLS automatically sets a variable called Task.Save to the value –1. In the event this happens, the Error_Found variable is set to 1. When the entry of the three tasks is complete, all will be rolled back if Error_Found = 1 so that it will not be possible to have some of the tasks successfully entered and some not.
|
|
SET Task = nlsApp.Tasks.New(4) Task.WorkPacketRefno = current_work_packet_refno Task.StatusCodeID = 1 Task.NLSRefno = CurrentTask.NLSRefno IF (Task.Save = -1) THEN Error_Found = 1 END IF |
This block of code sets up a task using task template #4 (Verify Deposit). |
|
SET Task = nlsApp.Tasks.New(5) Task.WorkPacketRefno = current_work_packet_refno Task.StatusCodeID = 1 Task.NLSRefno = CurrentTask.NLSRefno IF (Task.Save = -1) THEN Error_Found = 1 END IF |
This block of code sets up a task using task template #5 (Verify Credit). |
|
CurrentTask.CompletionDate = NOW |
This sets the completion date of the Loan Application task to the current system date of your computer. |
|
CurrentTask.StatusCodeID = 2 |
Sets the status of the Loan Application task to “Completed.” This is based on the task status codes that you have configured. |
|
IF (CurrentTask.Save = -1) THEN Error_Found = 1 END IF |
If there is any error in the processes of setting parameters on a task, NLS automatically sets a variable called Task.Save to the value –1. In the event this happens, the Error_Found variable is set to 1. When the entry of the three tasks is complete, all will be rolled back if Error_Found = 1 so that it will not be possible to have some of the tasks successfully entered and some not.
|
|
IF (Error_Found = 1) THEN nlsApp.Tasks.RollbackTransaction |
If any of the tasks failed to be entered properly, all of the tasks will be rolled back. |
|
ELSE nlsApp.Tasks.CommitTransaction END IF |
If there were no errors in entering any of the new tasks, they are all committed. |
|
END IF |
Closes the If-Then statement from the beginning of the script. Remember that none of these instructions were executed if the Application Status field was not set to "APP COMPLETE". |
Remaining Task Templates
The rest of the required task templates for the example we have described are configured with their appropriate scripting code.
Using the Task Manager
Once all of the tasks have been completely configured and all of the necessary scripting has been added, these tasks and work packets may be used. The use of these tasks is entirely driven by the scripting that has been entered on them, so our example will continue with the Loan Origination tasks.
Since the Work Packet and Task templates that we have added are configured as Contact only templates, we must add the Contact for our potential borrower first.
 next to
  on the toolbar and select
  under
under  in the ribbon bar and select
The entire bottom section of the Work Packet is blank because we have configured the Work Packet Template to have all of its user-defined fields hidden, since they were not needed.
Click OK to add the work packet to the Contact.
Once the Work Packet has been added to the Contact, it may be viewed from two different places.
The Task tab of the Contact toggles between Work Packets that are on that Contact and Tasks that are on that Contact. To view the Work Packet from here, query the Contact, click the Task tab, and then click Work Packet.
You may bring the screen for the individual Work Packet back up by double clicking the Work Packet in the list.
The second place from which the work packet may be accessed is the Inbox

 to bring up the list of all currently existing Work Packets.
By clicking on 
 next to a work packet, we can see any tasks that exist under this work packet.
Double click the work packet to view the work packet.
This task has a field for application status that is designed to allow the NLS user to track the loan application through various phases. First, the status shows that an application needs to be sent to the customer. Once it has been sent, the status is changed to reflect that fact. When the application has been returned from the customer and deemed to be complete, the change of its status to reflect this causes three new tasks to be automatically created.
Note
In this example, when we say that the field for application status that is designed to allow the NLS user to track the loan application through various phases, we mean it was designed as such by the creator of the tasks template in question, not by the designers of the Nortridge Loan System. The task manager is designed to allow you to design and program your own task templates, and those will do whatever you program them to do.Change the App Status to APP COMPLETE, and click 
 . This will cause the scripting behind this task to be executed, and that scripting is (in this case) designed to create three new tasks.
Do a new query of the Inbox to view the new tasks that have been created.
This concludes our example of Configuring and using Work Packets and Tasks.
For help on configuring your own tasks, call Nortridge Software Customer Support.
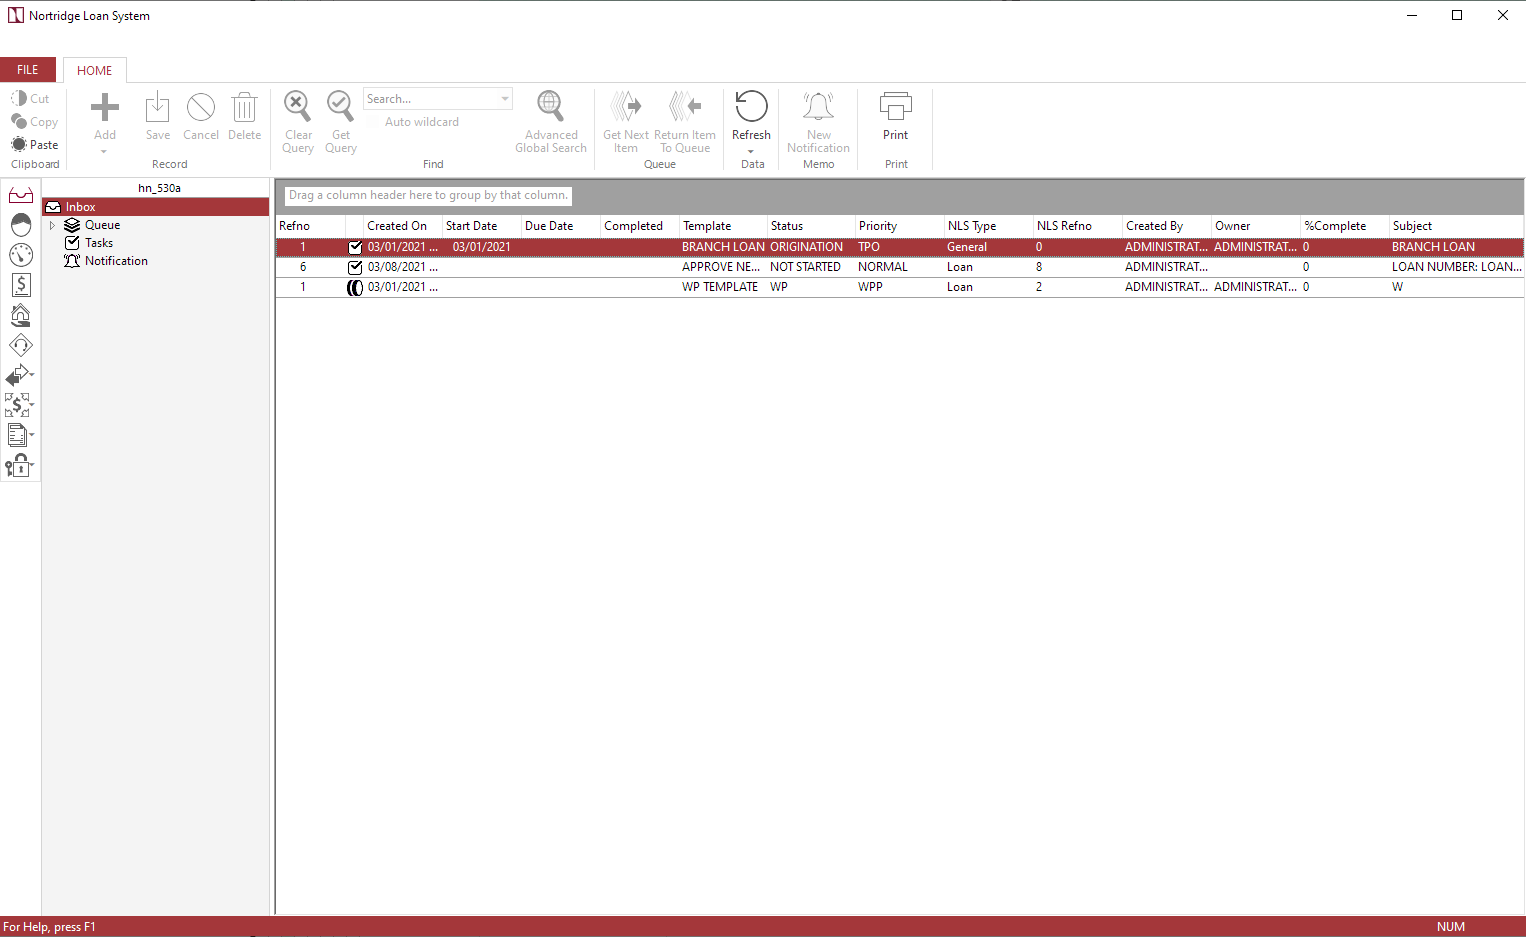
Inbox
The  Inbox lists tasks that are either owned by the current user or is assigned to the current user. Additionally, if branch is enabled, only tasks assigned to the current branch will be listed. If a task is assigned to a user but the user is not logged in under the same branch as the task, it will not appear in the list. Double-clicking an item in the inbox will display the details of that item.
 Queue lists associated tasks categorized under Work Queues.
Selecting  Tasks or
  Notification listed below Inbox will allow for querying of the selected item.
Note
 Work Packets have been deprecated and will only appear in NLS prior to version 5.24 or on a database that was configured with work packets prior to upgrading to NLS 5.24 or later.