Statements
In NLS, a Statement is defined as any document that is printed out on a periodic basis after being automatically spooled to a print queue.
Documents that may be printed at any time, on an as needed basis, are referred to in NLS as Reports.
NLS supports the spooling of two types of statements: Billing Statements and Periodic Statements.
Billing Statements
Billing Statements are automatically queued each time a billing is generated on a loan. The billing date is controlled by the due date of the payment and by the Billing Cutoff parameter of the loan.
Example
The next payment on a loan will be due on the first day of March 2007. The billing cutoff for this loan is –10. The system will set the Next Statement Date to February 19, 2007. When the daily accruals for February 19th are processed, the March 1st payment will be billed on the Loan System, and the statement will spool to the statement queue. The next time the statements are printed, this statement will be included in the statement print run.Periodic Statements
Periodic Statements are statements that go to the print queue on a specified day. This day is not determined by the existence of a receivable billing, but by the statement code setup.
Example
If the Periodic Statement is set to print monthly, and the last statement went into the queue on October 15th, the Next Statement Date will be set to November 15th. It is entirely independent of any billing process.A periodic statement setup could be used to print a monthly statement on a loan that has only quarterly or annual payments, or even no payments at all until maturity. In these cases, the Statement may show that nothing is due.
Periodic statements should also be used in cases where the only payments due are fees that were assessed through a recurring transaction; as such fees would not trigger a standard billing statement.
Printing Statements
To print statements, select Reports  > Statements
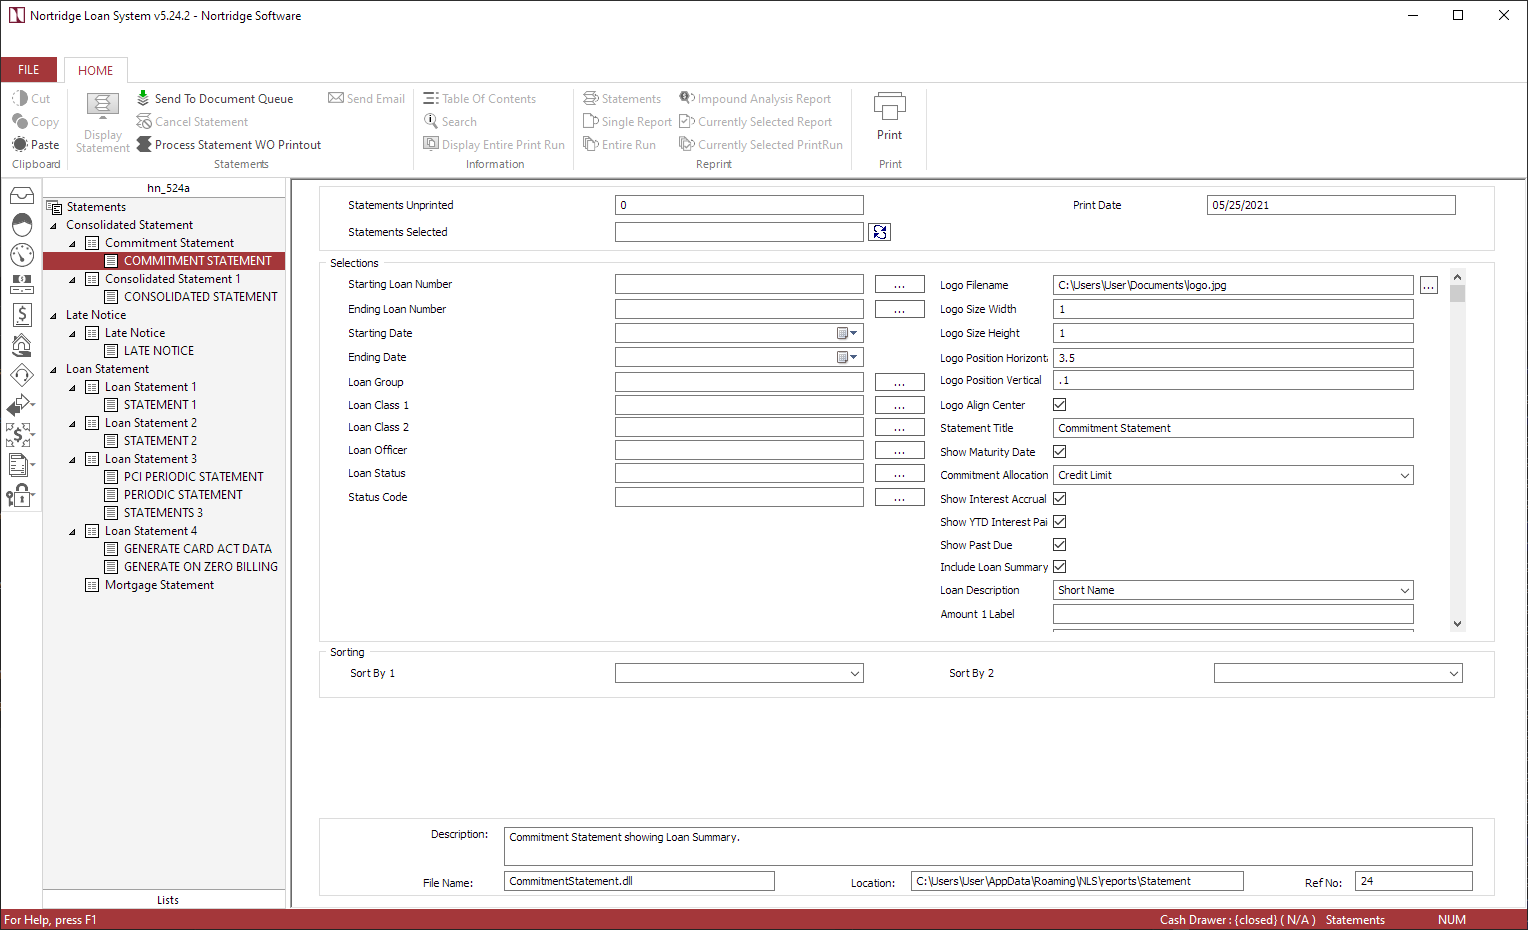
  in the shortcut bar. A list of the available statements will be loaded into the tree, and the main display will be populated with search criteria fields that will allow you to narrow the range of statements for your print run.
The number shown in the Statements Unprinted field is the total number of statements that have been queued, but never printed or purged. When a statement is processed it is marked as printed and is no longer included in this count. It may be printed again only by going to Reports  > Reprint Statements
  .
.
Click on one of the statement codes in the tree to select just the statements that belong to that particular format. The Statements Unprinted field will update to reflect the number of unprinted statements of that format only.
Do not try to print statements for the entire portfolio or for multiple statement codes at once without selecting a specific statement code. The parameters available are different for the various statement types, so if you do not select a specific statement code, you will not get a parameter list, and so you will not have the opportunity to select the various parameters for the statement print run.
If you wish to further narrow the range of statements in your print run, you may enter a loan number range, a date range (for statement date), a Loan Group, Loan Class, or Loan Officer. Once you have entered all of your parameters, click  next to the Statements Selected field.
Now, you may either click  Print in the ribbon bar or select
  Process Statement w/o Printout .
Clicking  will generate a print run consisting of all selected statements. These statements will be generated and sent to the printer. They will be marked in the database as printed, and a copy of each statement will be attached to the Documents and Correspondence tab of the appropriate loan.
Clicking  will generate a statement run consisting of all selected statements. These statements will be generated, but will not be sent to the printer. They will be marked in the database as printed, and a copy of each statement will be attached to the Documents and Correspondence tab of the appropriate loan. This option is generally used for old statements that may be in the queue as a result of your initial entry of loans on to NLS at the time that your portfolio is brought over from another system. In this case, you would not want to send the customer statements for billings that were already invoiced and paid in the past, but you may wish to have a statement generated and in the correspondence history so that it may be reprinted if necessary.
NLS 5.15 and later
When generating extra statements for co-borrowers and related contacts of a loan, the Forward statement to this contact option must be selected in the loan’s Relationships tab. Extra statements will no longer be generated using specific descriptions in address book entries or related contacts.NLS 5.16 and later
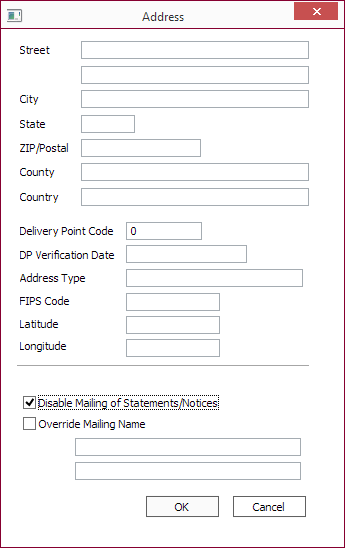
To prevent statements from being generated for specific contacts, go to the contact's address detail dialog and select the Disable Mailing of Statements/Notices option.
NLS 5.35.9 and later
Click Save Parameters to save the parameters without generating a statement. Parameters are automatically saved when a statement is generated.Late Notices
Late notices are generated to the print queue by late loan events.
Example
A late loan code is configured to generate a late notice when any payment on a loan goes 10 days past due. A loan with a payment due on the first of October is set up with this late loan code. If the payment has not been paid by October 11th, a late notice will go into the print queue.The procedure for generating and printing out the late notices that are in the queue is identical to the procedure for standard statements. Simply select the late notice from the tree instead of the statement.
Consolidated Statements
Consolidated statements are generated by statement codes attached to commitments. A consolidated statement is an invoice for multiple loans under a commitment. In order for a statement to work as a consolidated statement, the statement file must first be programmed as such, and then in configuration, the statement code must be designated as a consolidated statement. Finally, the statement code is attached to a commitment rather than a regular loan.
| Page Break Sections | For Commitment Statement only. If selected, each section will start on a separate page. In not selected, sections will print continuously. |
Reprinting
To reprint a statement that has already been printed, select Reports  > Reprint Statements
  .
.
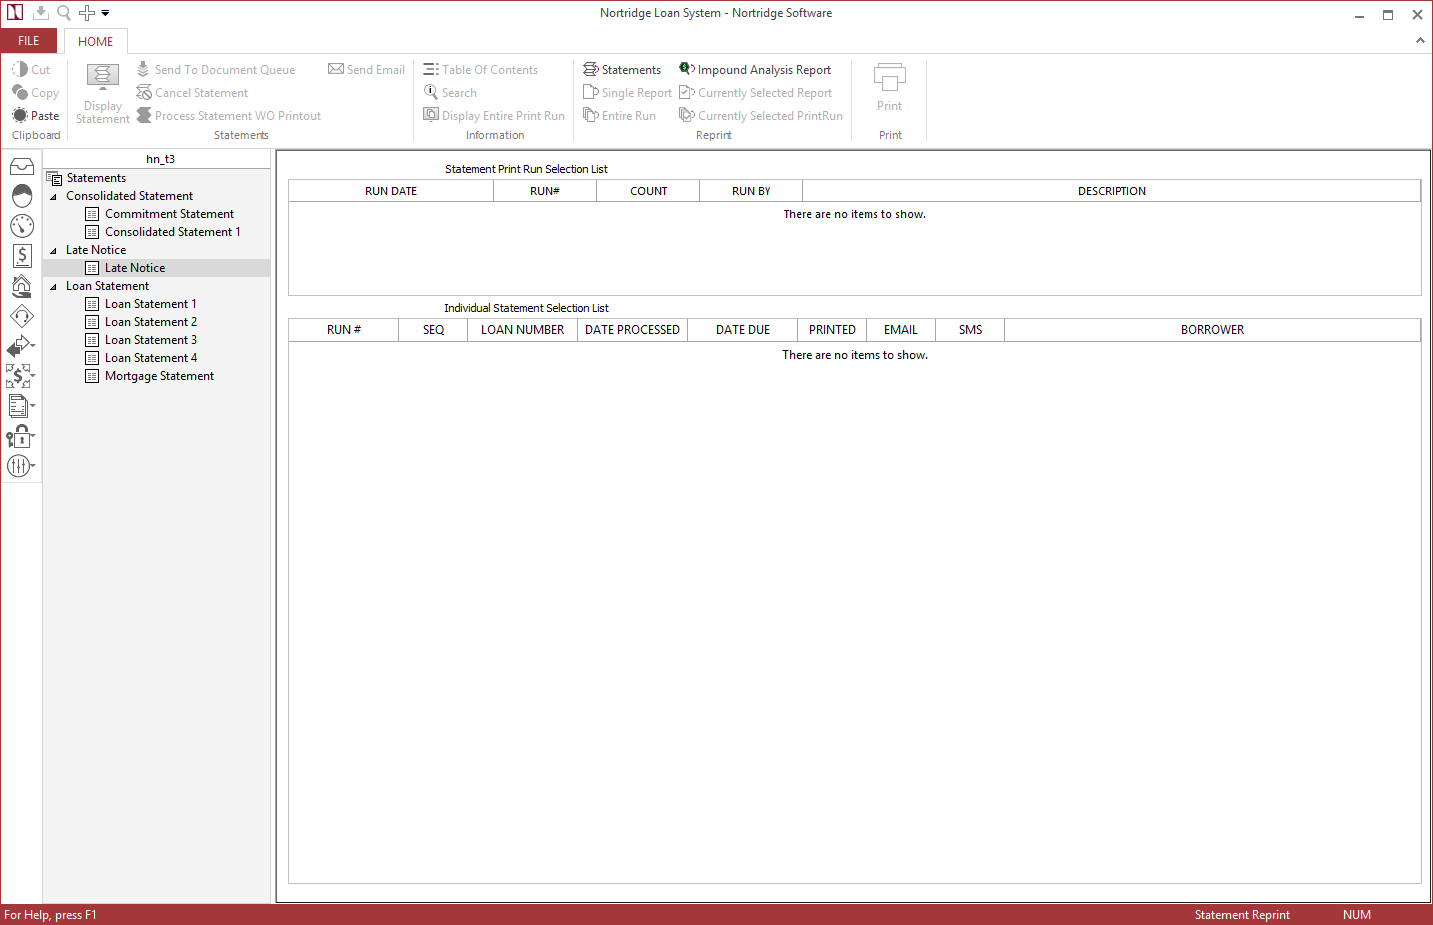
Select the Statement format from the tree that is the kind of statement you wish to reprint. The upper portion of the display will be loaded with a list of all the past statement print runs for that Statement format.
Select the statement print run that you wish to reprint, or in which the statement that you wish to reprint was generated. The lower section of the display will be loaded with a list of all of the statements in that run.
If you wish to print just a single statement, select that statement from the list.
You may print or generate (and display to the screen) either the specific statement selected or the entire selected print run.
Click  Display Statement or
  Display Entire Print Run to view the statement(s) on the screen. Click
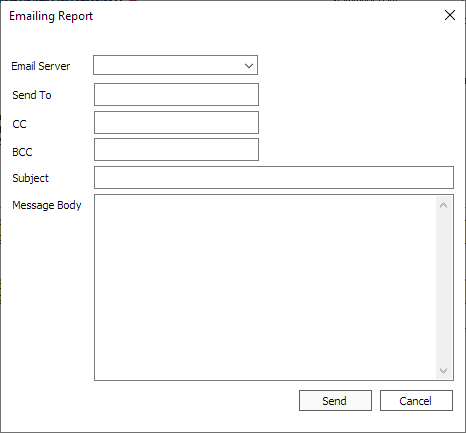
  Send Email to email the statement(s) being displayed. Depending on how the Email/SMS Servicer system defaults is configured, a new message with the statement(s) attached to it will be created in a separate email application or a window will appear for you to enter the necessary information to send the email.

Reprint
| Command | Description |
|---|---|
 Statements Statements |
Shows the Statements view. Same as selecting  Reports > Reports >  Statements. Statements. |
 Single Report Single Report |
Reprints the currently selected report. |
 Entire Run Entire Run |
Reprints the current print run. |
 Impound Analysis Report Impound Analysis Report |
Displays the Impound Analysis Reprint dialog where past runs can be viewed, printed, or saved. |
 Currently Selected Report Currently Selected Report |
Reprints the currently selected report. |
 Currently Selected PrintRun Currently Selected PrintRun |
Reprints the print run. |
Standard Statement Formats
Three standard statement formats are included with NLS.
Loan Statement 1 is a standard billing statement.
Loan Statement 2 is a standard billing statement with transaction history.
Loan Statement 3 is a highly customizable statement showing interest calculations and is suitable for use as a credit card statement.
Loan Statement 4 is a highly customizable statement showing how long it takes to pay off a balance and is suitable for use as a credit card statement.
Selection Parameters
| Parameter | Description | ||||
|---|---|---|---|---|---|
| Starting Loan Number | Statements can be select by an alphanumeric range of loan numbers. | ||||
| Ending Loan Number | Statements can be select by an alphanumeric range of loan numbers. | ||||
| Starting Date | Statements can be selected by a date range on the statement date. | ||||
| Ending Date | Statements can be selected by a date range on the statement date. | ||||
| Loan Group | Only statements from loans belonging to the loan group will be in the statement run. | ||||
| Loan Class 1 | Only statements from loans within Class 1 will be in the statement run. | ||||
| Loan Class 2 | Only statements from loans within Class 2 will be in the statement run. | ||||
| Loan Officer | Only statements from loans associated with the Loan Officer will be in the statement run. | ||||
| Loan Status | Only statements from loans with the specified loan status will be in the statement run. | ||||
| Status Code | Only statements from loans with the specified status code will be in the statement run. | ||||
| Logo Filename | If you have a .jpg file for a company logo, it must be placed on a local drive of each computer running NLS. This field contains the full path and filename to that .jpg file. | ||||
| Logo Size Width | The logo will be sized horizontally to this number (in inches). | ||||
| Logo Size Height | The logo will be sized vertically to this number (in inches). | ||||
| Logo Position Horizontal | The left edge of the logo will be placed this many inches from the left edge of the page. | ||||
| Logo Position Vertical | The top edge of the logo will be placed this many inches from the top edge of the page. | ||||
| Logo Align Center | If this checkbox is selected, the Logo Position Horizontal is overridden. The center of the logo will be aligned with the center of the page (4.25 inches). | ||||
| Statement Title | Text entered in this field will override the default title at the top of the statement. | ||||
| Address Description | The address of the specified address book entry to be displayed on the statement. NLS 5.15 and later This field is no longer available. |
||||
| Use Mailing Names | Mailing name will be used instead of the contact name. | ||||
| Show Titles | Appends the title field (President, Accounts Payable, etc.) to the customer name. | ||||
| Show Loan Officer | If selected, the Loan Officer is displayed on the statement. | ||||
| Distribute Heading Item | If selected, the heading items are distributed, equally spaced, vertically in the header. | ||||
| Show Due Date | If selected, the due date of the current amount due is displayed on the statement. | ||||
| Show Short Name | If selected, the contact shortname is displayed on the statement. | ||||
| Show Maturity Date | If selected, the Loan’s maturity date is displayed on the statement. | ||||
| Show Current Rate | If selected, the current interest rate is displayed on the statement. | ||||
| Show Loan Amount | If selected, the loan amount is displayed on the statement. | ||||
| Show Current Principal | If selected, the current principal is displayed on the statement. | ||||
| Show Current Interest | If selected, the current interest amount is displayed on the statement. | ||||
| Show Current Fees | If selected, the current fees is displayed on the statement. | ||||
| Show Current Late Charges | If selected, the current late charges is displayed on the statement. | ||||
| Show Current Impound | If selected, the current impound amount is displayed on the statement. | ||||
| Show YTD Interest Paid | If selected, the total interest paid from the beginning of the year to the current date is displayed on the statement. | ||||
| Show Available Credit | If selected, the current available credit is displayed on the statement. | ||||
| Payments Due Section |
|
||||
| Show Payment Number | If selected, the payment number column is displayed on the statement. | ||||
| Show Future Payments | If selected, all billed payments will be displayed on the statement. If unselected, any payments due on or after the specified Reference Date will be excluded from the statement. |
||||
| Reference Date | Applicable only when the Show Future Payments option is unselected. | ||||
| Past Due Summary | If selected, a summary line of total past due amounts is displayed on the statement. | ||||
| Message Line | The text in this field will appear on all statements in the print run. This is used for reminders and seasonal greetings. | ||||
| Message Height | The height, in inches, to be reserved for the message line. | ||||
| Show Remittance | If selected, the remittance copy portion of the statement is displayed. | ||||
| ACH Message | The text in this field will appear on all statements in the print run. This is generally used for statements that go to borrowers who have their payments made via ACH, so the text will often be something like, “Send no payment. Your bank account will be debited.” | ||||
| Use Legacy Layout | If selected, the statement will be displayed using a previous layout design. |
Sort Order Options
NLS 5.28 and later
When Setup > Loan Setup > Defaults > Muti Threading > Statement Process Max Thread Count is greater than 1, sorting is not available.You may choose to have the printing order sorted in ascending alphanumerical order using the Sorting drop down list.
| Loan Group |
| Loan Class 1 |
| Loan Class 2 |
| Loan Officer |
| Loan Number |
| Contact Number |
| Contact Shortname |
| Loan Name |
| Loan Shortname |
|
Statement Due Date5.28+
|
Tip
All Selection and Sorting Options on any particular statement code will remain after a statement print run, so that the next time you go to run statements, the options that you have selected are set as your starting point. Refer to Statement Setup on creating statement codes.


